 Save
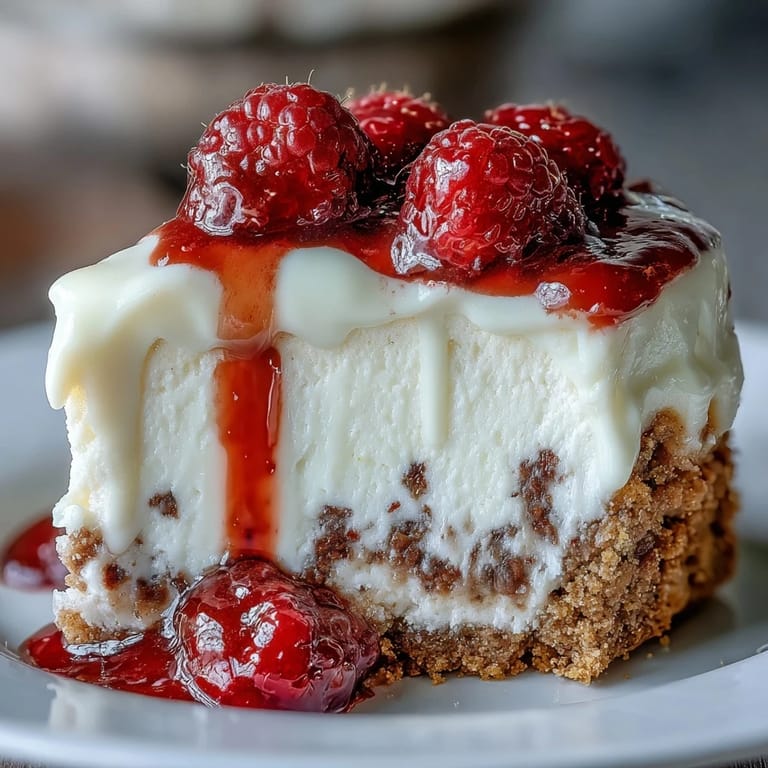
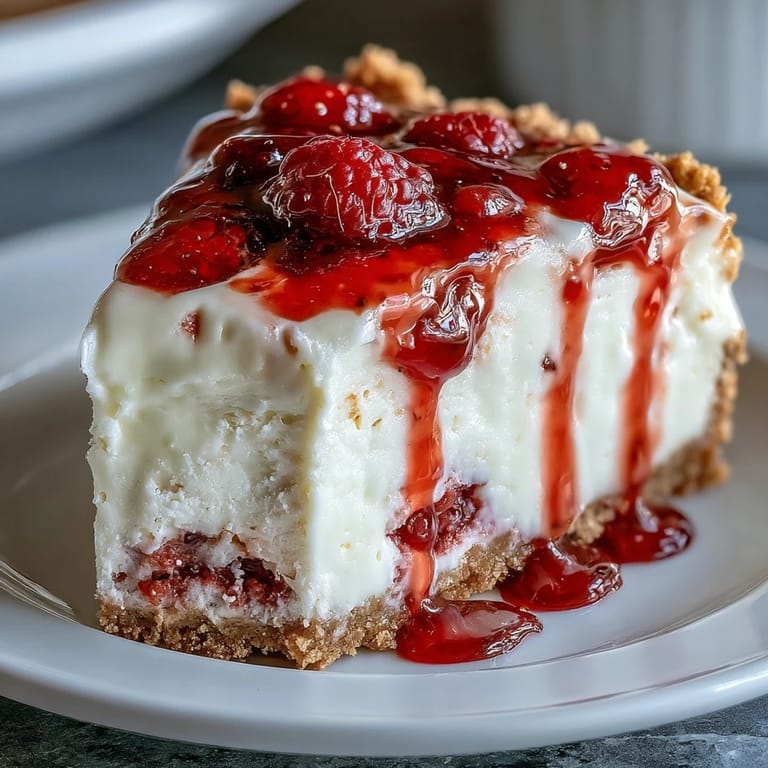
Save There's something about watching white chocolate melt that makes you believe in magic. Years ago, my sister brought this cheesecake to Thanksgiving, and the whole room went quiet when she sliced into it—that perfect swirl of raspberry cutting through the creamy white filling. I asked for the recipe that night, thinking it would be complicated, but what I found instead was a dessert that rewards patience more than skill. The combination of tangy raspberries against silky white chocolate felt like it was designed by someone who understood exactly what comfort tastes like.
I made this for my best friend's bridal shower, and she cried when she tasted it—actual tears. The kitchen was chaos that morning, ovens preheating, borrowed springform pans everywhere, and I was convinced something would go wrong. But when we pulled it from the oven and saw that gentle wobble in the center, I knew we'd nailed it. She still texts me about that cheesecake, three years later, and asks me to make it for every celebration now.
Ingredients
- Graham cracker crumbs (1 1/2 cups): The foundation that keeps everything together—use full-fat butter to press them, or the crust becomes more crumbly than cohesive.
- White chocolate (12 ounces, chopped): Buy good quality here because it's the star; cheap white chocolate tastes waxy, and you'll taste the difference with every spoonful.
- Cream cheese (24 ounces, softened): Room temperature is non-negotiable—cold cream cheese creates lumps that no amount of beating fixes.
- Eggs (3 large): Add them slowly and don't overmix once they're in; this is where so many people accidentally make their cheesecake dense and heavy.
- Sour cream (1 cup): This adds tang that balances the sweetness and keeps the texture velvety instead of heavy.
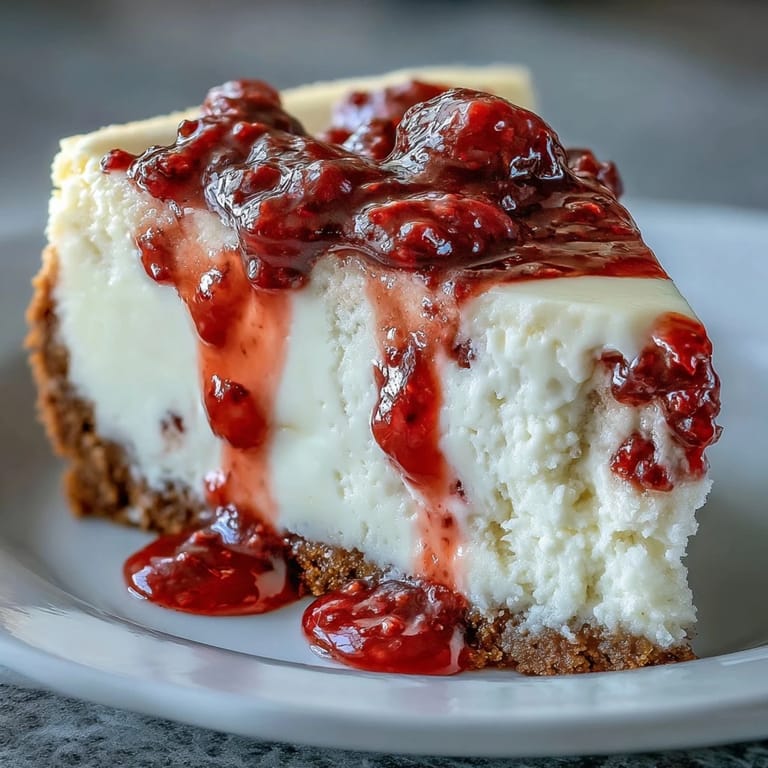
- Fresh or frozen raspberries (1 cup): Frozen works beautifully here, sometimes better than fresh because the juice is already concentrated and ready to swirl.
- Heavy cream (1/4 cup): This small addition makes the filling lighter and almost mousse-like in the best way.
Tired of Takeout? 🥡
Get 10 meals you can make faster than delivery arrives. Seriously.
One email. No spam. Unsubscribe anytime.
Instructions
- Build Your Crust Foundation:
- Mix graham cracker crumbs with sugar and melted butter until it resembles wet sand, then press it firmly into your springform pan with the bottom of a measuring cup. Bake for just 8 minutes—this sets it without making it hard—then let it cool while you prep everything else.
- Cook Down the Raspberries:
- Combine your raspberries, sugar, and lemon juice in a saucepan and let them bubble gently for 5 to 7 minutes until the mixture thickens and smells like concentrated berry heaven. If you prefer seedless sauce, pour it through a fine strainer while it's still warm, then set it aside to cool completely.
- Melt the White Chocolate Gently:
- Use a double boiler or microwave in 20-second bursts, stirring between each burst, until it's completely smooth and silky. Let it cool for a few minutes so it doesn't scramble your eggs when you fold it in.
- Create the Cheesecake Base:
- Beat softened cream cheese with sugar until it's pale and fluffy, which takes about 3 minutes of steady beating. Add eggs one at a time, mixing just until combined after each one, then fold in vanilla, sour cream, heavy cream, and finally the cooled white chocolate.
- Layer and Swirl With Intention:
- Pour half the batter over your cooled crust, dollop with half the raspberry sauce, and drag a knife through it in loose figure-eights for that beautiful marbled effect. Repeat with remaining batter and sauce on top, keeping your swirls soft and confident.
- Create a Water Bath Protection:
- Wrap your springform pan in two layers of foil, then place it in a larger roasting pan and fill with hot water until it reaches halfway up the sides. This gentle, moist heat keeps the cheesecake from cracking and ensures a creamy center.
- Bake and Cool Strategically:
- Bake for 60 to 70 minutes until the edges are set but the very center still jiggles slightly when you nudge the pan. Turn off the oven, crack the door open, and let it cool inside for a full hour before removing it, which prevents sudden temperature shock.
- Chill Thoroughly:
- Refrigerate for at least 4 hours, though overnight is better because it allows the flavors to meld and the texture to become perfectly sliceable. This waiting is the hardest part, but it's what separates good cheesecake from unforgettable cheesecake.
 Save
Save There's a moment when you pull this out of the pan and see the whole thing intact, swirls perfectly visible, and you realize you've created something genuinely beautiful. My mom called it my masterpiece, and I think she meant it.
White Chocolate Quality Matters
The first time I used budget white chocolate, nobody said anything rude, but I could taste their politeness. Once I switched to better quality, the same people asked for seconds without prompting. White chocolate already has a reputation for being waxy, so starting with something decent—look for brands that use real cocoa butter instead of vegetable oil—makes an enormous difference in how luxurious each bite feels.
The Water Bath Isn't Optional
I tried skipping it once because I was impatient, and the cheesecake cracked dramatically, almost like it was announcing my mistake to the entire kitchen. The water bath isn't a suggestion; it's the difference between a creamy, restaurant-quality dessert and a broken, grainy one. The moisture keeps the filling silky and prevents that dense, overcooked texture that happens when oven heat hits it directly.
Make It Your Own With Flavor Variations
Once you nail the basic recipe, you can play with it endlessly. I've made versions with lemon zest swirled through, cherry sauce instead of raspberry, and even a white chocolate-matcha version that looked like art. The technique stays exactly the same; you're just changing what swirls through the creamy center. Here's what else works beautifully in this framework:
- Swap the raspberry sauce for passion fruit curd, salted caramel, or dark chocolate ganache for completely different flavor stories.
- Add citrus zest (lemon, lime, or orange) directly into the cheesecake batter for brightness that plays against the richness.
- Toast the graham cracker crust with a pinch of sea salt to add depth and make the sweetness feel more sophisticated.
 Save
Save This cheesecake has become my answer to celebration, comfort, and proving to myself that I can create something genuinely special. Make it for someone you love, and watch their face when they taste it.
Recipe FAQs
- → How do I prevent cracks in my cheesecake?
Bake in a water bath to maintain even moisture, avoid overmixing the batter after adding eggs, and let it cool gradually in the oven with the door cracked. Room temperature ingredients also help ensure smooth texture.
- → Can I make this ahead of time?
Absolutely. This actually tastes better when made 1-2 days ahead, allowing flavors to meld. Keep it tightly covered in the refrigerator. The crust stays perfectly crisp and the texture becomes even creamier after resting.
- → Why do I need a water bath?
The water bath creates gentle, humid heat that prevents the cheesecake from puffing up and cracking. It ensures the cheesecake cooks evenly, resulting in that signature silky, creamy texture throughout.
- → Can I use frozen raspberries instead of fresh?
Yes, frozen raspberries work beautifully for the sauce. They may need slightly longer cooking time to break down and may require adjusting sugar to taste since frozen berries can be more tart than fresh.
- → How should I store leftovers?
Wrap the cheesecake tightly in plastic wrap or store in an airtight container in the refrigerator for up to 5 days. For longer storage, slice and freeze individual portions wrapped well for up to 2 months.
- → What's the best way to get clean slices?
Dip your knife in hot water and wipe it clean between each slice. Use a thin, sharp knife and cut with a gentle sawing motion. For perfect portions, you can also run the knife under warm water before each cut.