 Save
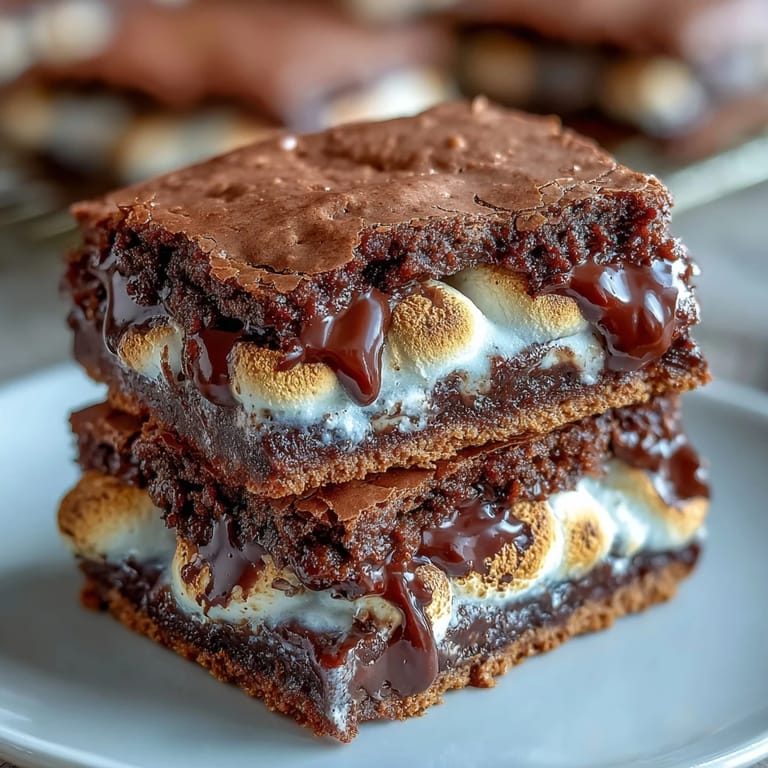
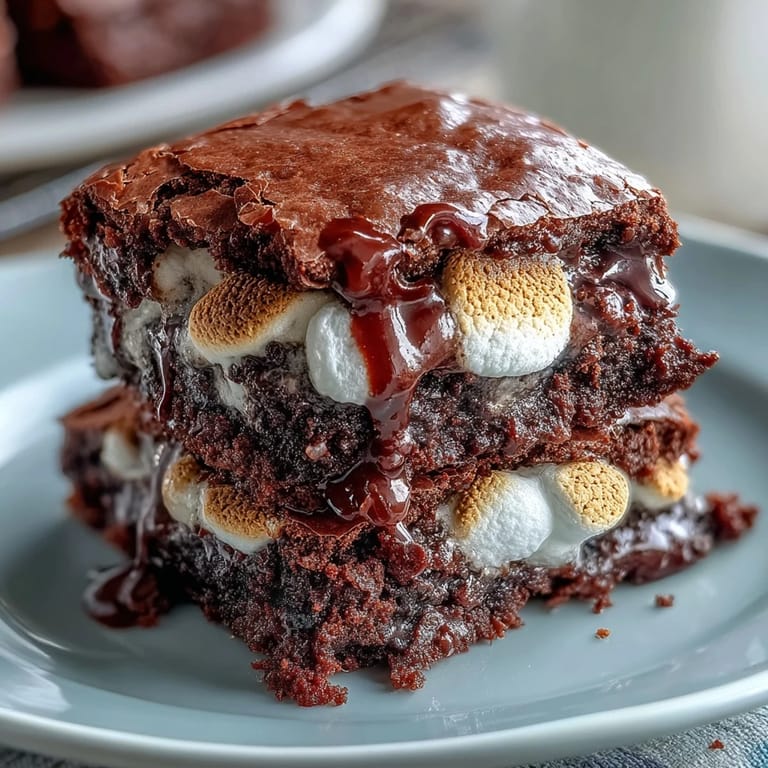
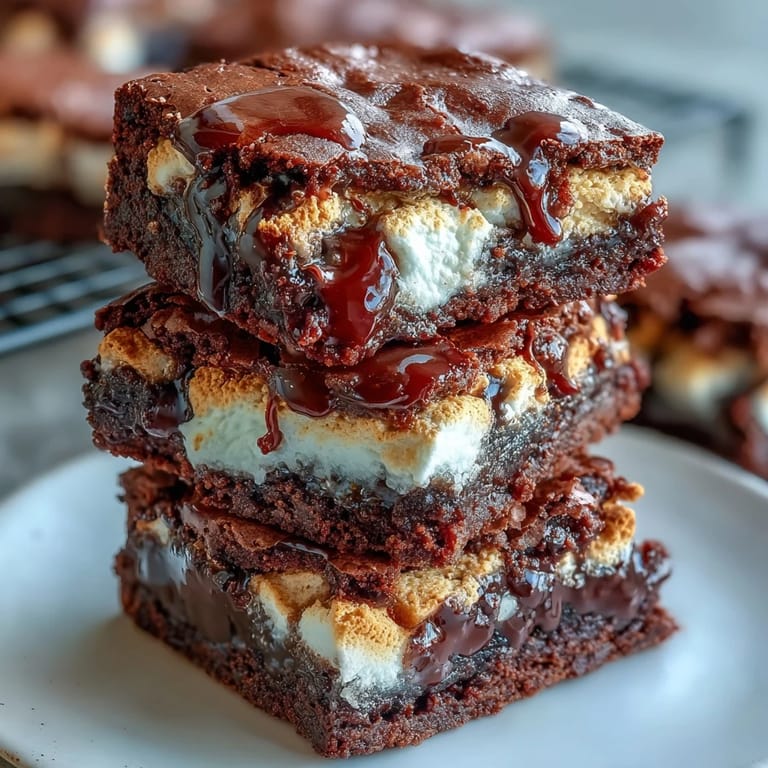
Save My daughter came home from a camping trip absolutely obsessed with s'mores, but the campfire season had passed and she wasn't about to wait until summer. So one rainy afternoon, I decided to bring that gooey, chocolatey magic into the kitchen in cookie form. These brownie-based treats hit that perfect sweet spot between fudgy and chewy, with the nostalgic crunch of graham crackers baked right in. The marshmallow top melts into pockets of warmth on the first bite, and honestly, they've become the cookies everyone requests.
The first time I made a full batch, my partner walked into the kitchen while the marshmallows were broiling and the smell hit him all at once—chocolate, toasted sugar, graham cracker crumbs. He stood there silently for a moment, then asked if we were opening a bakery. Three cookies disappeared before they even cooled completely, and I realized I'd stumbled onto something that bridges the gap between weeknight dessert and genuine indulgence.
Ingredients
- Brownie mix: This is your shortcut to fudgy perfection without measuring flour, cocoa, or leavening agents, and it keeps the texture consistently tender.
- Eggs and vegetable oil: These bind the dough and create that soft, chewy center that makes these cookies feel more indulgent than regular brownies.
- Water: Just a tablespoon keeps the dough from becoming too dense, allowing the cookies to spread gently and bake evenly.
- Semi-sweet chocolate chips: They add pockets of melted chocolate throughout, amplifying the s'mores experience beyond what brownie mix alone can deliver.
- Crushed graham crackers: Toast them lightly in a dry skillet for a few minutes first if you want extra flavor, though raw works perfectly fine too.
- Large marshmallows: One per cookie means no fighting over toppings, and they puff up beautifully when added at exactly the right moment.
- Mini chocolate chips and extra graham crackers: These optional toppings add visual appeal and reinforce that s'mores identity everyone craves.
Tired of Takeout? 🥡
Get 10 meals you can make faster than delivery arrives. Seriously.
One email. No spam. Unsubscribe anytime.
Instructions
- Prepare your workspace:
- Heat your oven to 350°F and line two baking sheets with parchment paper. Having everything ready means you won't be scrambling when cookies come out of the oven, especially since the marshmallow window is short.
- Mix the base dough:
- Combine the brownie mix, eggs, oil, and water in a large bowl, stirring just until no dry streaks remain. Overmixing makes cookies tough, so stop as soon as everything looks combined.
- Fold in the mix-ins:
- Gently fold the chocolate chips and crushed graham crackers into the dough using a spatula or wooden spoon. This keeps the dough tender and prevents the chocolate from breaking into tiny pieces.
- Scoop and space:
- Drop heaping tablespoons of dough onto the prepared sheets, leaving about 2 inches between each one since they spread slightly. You should get exactly 18 cookies, one marshmallow per cookie.
- First bake:
- Bake for 8 to 9 minutes, until the edges look set but the centers still jiggle slightly when the sheet moves. They'll continue cooking from residual heat once you remove them.
- Add the marshmallows:
- Pull the cookies from the oven and immediately press one large marshmallow onto the center of each one, pressing gently until it sits firmly. This is the moment the cookies are warm enough to soften the marshmallow slightly, creating that adhesive effect.
- Melt the marshmallow:
- Return the sheet to the oven for 1 to 2 minutes, just until the marshmallows puff up and look slightly pillowy. Don't walk away from the oven during this step.
- Toast if you're feeling fancy:
- If you want caramelized edges on the marshmallows, run the cookies under the broiler for 30 seconds, watching intently to catch them right as they turn golden. This step is optional but transforms good cookies into restaurant-quality ones.
- Garnish while warm:
- Remove from oven and immediately sprinkle mini chocolate chips and extra graham cracker crumbs over the warm marshmallows, so they stick. The residual heat helps everything adhere.
- Cool and set:
- Let the cookies sit on the baking sheet for 5 minutes so the marshmallow firms up slightly, then transfer to a wire rack to cool completely. Patience here prevents marshmallows from sliding off.
 Save
Save Last month, I brought a batch to a neighborhood potluck and watched grown adults close their eyes on the first bite, that exact expression of childhood joy mixed with adult indulgence washing over their faces. That's when I knew these weren't just cookies—they were tiny edible memories.
Storage and Make-Ahead
These cookies stay soft and chewy in an airtight container for up to 3 days, though I've found they actually taste better on day two as the flavors deepen. If you're baking ahead for a gathering, store them in a single layer separated by parchment paper so the marshmallow tops don't stick together. You can also prepare the cookie dough ahead and refrigerate it for up to 24 hours—just add a minute or two to the baking time if baking from cold.
Customizations and Flavor Variations
Once you understand the basic structure, these cookies become a canvas for experimentation. Swap in dark chocolate chips for a deeper flavor, or add a pinch of cinnamon and sea salt to the dough for unexpected sophistication. Some people press crushed Oreos or peanut butter cups onto the marshmallow before broiling, though purists like me prefer to keep the s'mores theme pure.
Toasting Methods and Tips
The broiler works perfectly fine if you stay alert, but if you own a kitchen torch, it gives you precise control over how caramelized your marshmallow gets. The oven broiler offers that nostalgic toasted look quickly, while a torch lets you work methodically and catch them exactly when they hit that golden-brown sweet spot. Either way, the key is watching—marshmallows go from perfect to burnt in seconds.
- If your oven broiler heats unevenly, rotate the sheet halfway through the 30-second broil for even toasting.
- Let marshmallow-topped cookies cool completely before stacking or transporting, as warm marshmallow is still soft enough to compress.
- For parties, bake the cookies ahead and add marshmallows fresh on the day of serving to keep them from getting stale.
 Save
Save These cookies prove that you don't need camping trips or perfect conditions to relive those warm, simple moments of melted chocolate and toasted sugar. Keep a batch in your kitchen for the next time someone needs a little magic on an ordinary day.
Recipe FAQs
- → Can I use dark chocolate chips instead of semi-sweet?
Yes, dark chocolate chips add a richer flavor and pair well with the graham crackers and marshmallows.
- → How do I get the marshmallows toasted evenly?
After placing marshmallows on the cookies, broil them for 30 seconds while watching closely to achieve a golden brown, toasted top.
- → Is it possible to make these cookies gluten-free?
You can substitute the brownie mix and graham crackers with gluten-free versions to accommodate dietary needs.
- → How long do the cookies stay fresh?
Store the cookies in an airtight container for up to three days to maintain freshness and texture.
- → Can I prepare the dough ahead of time?
Yes, you can prepare the dough and refrigerate it for a day before baking to save time.