 Save
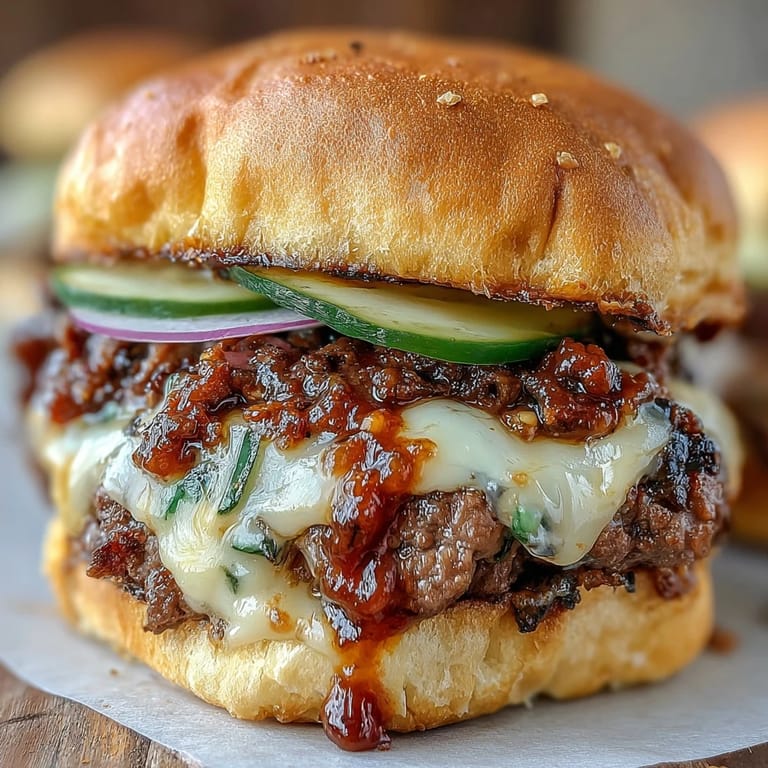
Save Somewhere between the sharp sizzle of beef hitting a hot skillet and the tang of pickled relish wafting from the bowl, I realized these smash burger sliders represent summer gatherings better than any flag cake ever could. The first time I pressed those burger balls down and watched little crispy edges form, the kitchen smelled alive with anticipation, like any great party about to begin. Making these is messy in all the good ways—my counters hold a constellation of pickle slices, sauce drips, and lettuce shreds by the end. Memorial Day became my unofficial kick-off point for these golden, cheesy sliders, and every year, they prove themselves a crowd magnet. If you love laughter ringing through the yard and juice running down your wrist, you’ll understand the magic here.
One Memorial Day, my cousin took charge of the speaker, curating a playlist nobody asked for while I attempted to smash burgers between flying frisbees and kids sneaking extra pickle chips. I’ll never forget my aunt’s face lighting up as she snuck a slider off the plate while they were still steaming, declaring the secret sauce had to be bottled immediately. That day, ketchup stains and laughter were equally abundant, which is pretty much the spirit of these sliders. Even the skeptics (usually over the age of 60 and loyal to their ketchup-mustard combo) conceded a second helping after tasting that tangy sauce. There’s just something about crispy beef and gooey cheese that brings people back to the table.
Ingredients
- Ground beef (80/20 blend): The higher fat content makes the patties juicy and crisp at the edges; don’t be tempted by leaner blends, or you’ll miss out on tenderness.
- Slider brioche buns: Brioche’s slight sweetness and fluffiness hold together beautifully and soak up sauce without falling apart.
- American cheese (or cheddar): American cheese melts into the perfect gooey layer, but swapping in cheddar introduces a sharper bite, depending on your mood.
- Dill pickle chips: The briny tang and crunch offer the ideal bite to cut through rich beef—double up if you're a pickle fan.
- Red onion, thinly sliced: Sliced ultra-thin, red onion gives a bite without overpowering, so I use a mandoline for perfect rings.
- Shredded iceberg lettuce: The cool crunch of iceberg offers a refreshing contrast and a bit of classic diner nostalgia.
- Mayonnaise: Essential as the creamy base for the secret sauce; don’t skip it or the sauce falls flat.
- Ketchup: Brings sweetness and color to the sauce, and a little goes a long way.
- Yellow mustard: Adds tang and color to the secret sauce—classic for that burger-joint feel.
- Sweet pickle relish: My not-so-secret ingredient for that characteristic tang and sweet crunch in every bite of sauce.
- White vinegar: Just a splash brings everything in the sauce to life; skip and you’ll miss the zing.
- Garlic powder: Gives undercover savoriness in the sauce, no chopping required.
- Paprika: Adds subtle warmth and color—smoked paprika works for depth if you’re adventurous.
- Kosher salt and black pepper: Key for seasoning both the beef and the sauce—always taste as you go.
- Unsalted butter, melted: Brushing this on the buns before toasting makes them so golden and fragrant you’ll want to eat them plain.
- Cooking oil: Helps the patties crisp without sticking; high-heat oils like canola or grapeseed are my go-to.
Tired of Takeout? 🥡
Get 10 meals you can make faster than delivery arrives. Seriously.
One email. No spam. Unsubscribe anytime.
Instructions
- Make the Secret Sauce:
- Stir together all the sauce ingredients in a small bowl until smooth and pink. Taste, adjust salt and pepper, then pop it in the fridge so its flavors can mingle.
- Shape Burger Balls:
- Divide ground beef into 8 gentle balls with just your hands—they don’t need to be perfect. Don’t squish them too tightly, or you’ll lose that tender bite.
- Toast Your Buns:
- Brush the cut sides of each bun with melted butter and toast on a skillet or grill, face down, until deeply golden and a little crispy at the edges. Set aside on a tray, trying not to sneak a nibble yourself.
- Time to Smash and Sizzle:
- Heat a griddle (or cast-iron skillet) on high until it just begins to smoke. Add a bit of oil, then place a few burger balls on and smash them quickly with your spatula until thin; listen for the hiss and don’t move them till edges get dark brown and lacy.
- Cheese It and Flip:
- Once juices bead on the top and crispy crust forms, flip the patties and top each with a cheese slice. Let the steam melt the cheese while the bottom browns—just a minute more.
- Assemble Your Sliders:
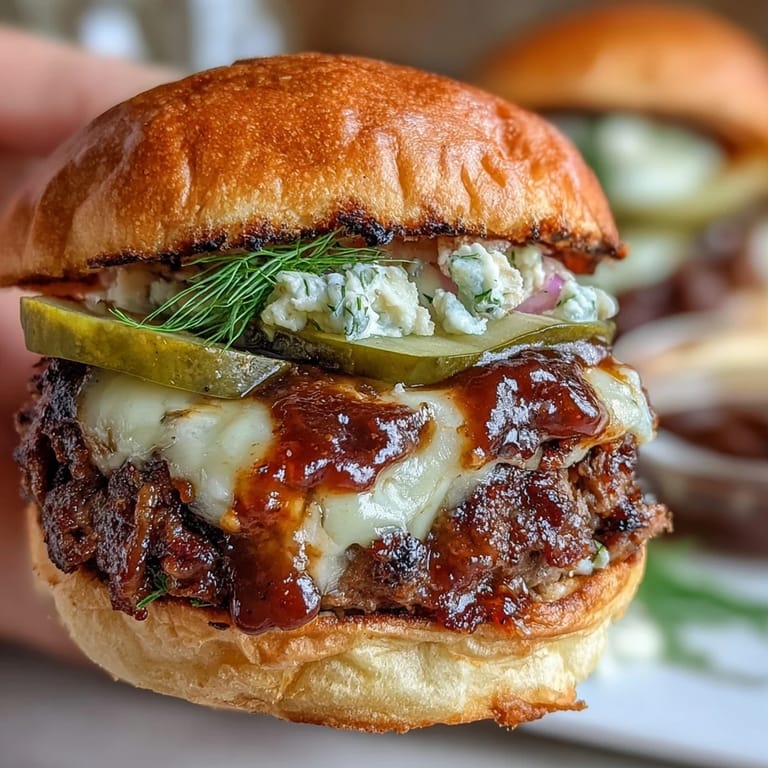
- Generously spread secret sauce on both top and bottom buns. Stack lettuce, burger patty with melted cheese, 2 pickle chips, and a sprinkle of red onion, capping with the top bun—press gently, and stop to admire your work.
- Serve and Enjoy:
- Serve these fresh off the griddle with extra sauce for dunking and a heap of napkins—you’ll need them.
 Save
Save  Save
Save When a friend snapped a photo of our messy hands as we reached for seconds, it hit me—these sliders had already become part of our group’s Memorial Day tradition. There’s something about sharing a tray of melt-y, saucy mini burgers outdoors that turns hungry guests into happy, loyal fans.
Mastering the Smash
If you’re new to making smash burgers, it’s all about timing and pressure. Smashing down quickly locks in the juiciness, while waiting for those telltale sizzling edges creates the perfect crunch. The aroma in the kitchen is wildly satisfying—like the best roadside stand, but in your own home. Even if you fumble the first patty, the next one will be better. Keep paper towels nearby to wipe the spatula between batches for easier smashing.
Slider Assembly Secrets
Stacking order isn’t just for looks—the lettuce on the bottom keeps the bun from getting soggy, while onions on top of the cheese gently steam for extra sweetness. Be generous with the sauce and don’t be shy with the pickles, especially if you want that signature zippy bite. A little red onion goes a long way; thin slices are the difference between punchy crunch and an overpowering bite. For a big group, let everyone build their own, just like a slider bar—kids especially love piling on the toppings. Toasted buns are the unsung hero: wait till you try one with a little cheese crisped onto the edge.
A Few More BBQ Tricks
On windy days, I’ve learned to keep the grill close to the kitchen door so I’m not chasing napkins down the driveway. If you want your sliders to stay hot for longer, cover a tray loosely with foil and stash them in a low oven while batch-cooking. For those with strong sauce opinions, simply double the secret sauce recipe and serve a bowl on the side.
- Use two spatulas for easier flipping and smashing if your skillet is crowded.
- Don’t salt the beef ahead—season just before or during smashing for the best sear.
- Make extra—these have a habit of disappearing fast.
 Save
Save  Save
Save Here’s to carefree grilling, sauce-stained fingers, and the little moments that taste like summer. Feed your people, and let the laughter linger longer than the last bite.
Recipe FAQs
- → Why do smash patties get crispy edges?
High heat and a thin, flattened patty create intense surface contact, triggering the Maillard reaction. Press firmly once and avoid moving the patty so the edges brown and crisp.
- → What fat ratio is best for smash burgers?
An 80/20 grind balances flavor and juiciness; the higher fat content helps produce quick browning and keeps thin patties moist during the short cook time.
- → How do I keep buns from getting soggy?
Brush cut sides with melted butter and toast them cut-side down until golden. The toasted surface and a layer of lettuce help shield buns from excess moisture.
- → When should I add the cheese for best melt?
After flipping the patties, add cheese immediately and let them cook briefly on the second side so the slice melts evenly without overcooking the meat.
- → How long does the secret sauce keep?
The mayo-based sauce can be stored in an airtight container in the fridge for up to 4–5 days. Stir before using and discard if it shows signs of separation or off odors.
- → Can I prepare components ahead of time?
Yes. Form the meat balls and refrigerate on a tray covered for a day, and make the sauce up to several days ahead. Toast and assemble just before serving for best texture.